Setting up Go for development on OS X
November 10, 2013
Requirements
This tutorial has been tested on OS X Mavericks. If you have execute it successfully on a different environment please let me know and I'll mention it.
This tutorial requires a basic knowledge of the command line. If you don't feel confident with it, follow The Command Line Crash Course.
Lines starting with $ indicate a command that you'll need to execute in your command line - so please don't type that initial $ ;)
Installation
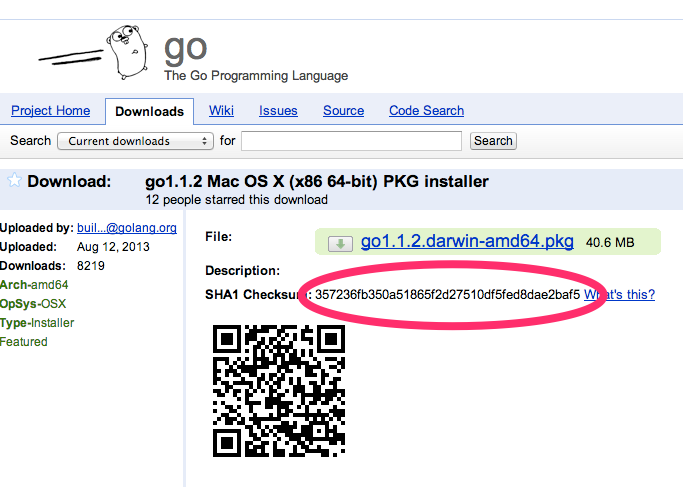
Install Go's current stable version from the official downloads page:
1 | $ wget https://go.googlecode.com/files/go1.1.2.darwin-amd64.pkg |
Compare the installer's checksum:
1 2 | $ openssl sha1 go1.1.2.darwin-amd64.pkg SHA1(go1.1.2.darwin-amd64.pkg)= 357236fb350a51865f2d27510df5fed8dae2baf5 |
with the official page's:
1 | $ open https://code.google.com/p/go/downloads/detail?name=go1.1.2.darwin-amd64.pkg |
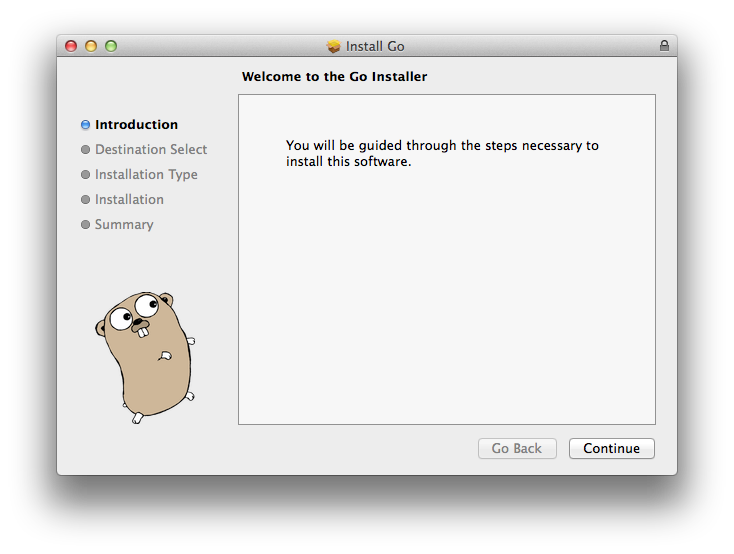
Open the installer
1 | $ open go1.1.2.darwin-amd64.pkg |
Smile at that little gopher and start clicking:
The Go executables will be installed under /usr/local/go/bin. Test that they work:
1 2 | $ /usr/local/go/bin/go version go version go1.1.2 darwin/amd64 |
Delete the installer:
1 | $ rm go1.1.2.darwin-amd64.pkg |
Define the executables' directory as $GOROOT and add it to your $PATH in your bashrc or bash_profile file:
1 2 3 4 | # bashrc or bash_profile export GOROOT=/usr/local/go export PATH=$PATH:$GOROOT/bin |
After opening a new terminal, you should have access to the go executable from any directory.
1 2 3 | $ cd ~ $ go version go version go1.1.2 darwin/amd64 |
Workspace
All the Go stuff (source code, compiled packages and executables) will reside under a single directory defined as $GOPATH. I'll choose ~/work/go/:
1 2 3 | $ export GOPATH=~/work/go $ mkdir -p $GOPATH $ cd $GOPATH |
All the source code will reside under a $GOPATH/src directory:
1 | $ mkdir -p $GOPATH/src |
To avoid naming collisions, all your Go source code should reside under a unique directory. A common practice is using your GitHub account as namespace. In my case it's github.com/raul, you'll need to replace raul with your GitHub username during the rest of the tutorial:
1 | $ mkdir -p $GOPATH/src/github.com/raul |
Compiling and installing a program
Create a hello-go directory for your first "Hello, world!" program and download its source code:
1 2 3 | $ mkdir -p $GOPATH/src/github.com/raul/hello-go $ cd !$ $ wget https://gist.github.com/raul/c168e41b78e23414c3b0/raw/hello.go |
Take a look at the source code with cat hello.go:
1 2 3 4 5 6 7 8 9 10 | // hello-go/hello.go package main import "fmt" func main() { fmt.Println("Hello, Go!") } |
Compile and install it in a single step:
1 | $ go install . # No output means a successful compilation |
You don't need to specify the file because Go will look for the file with the main() function in the current directory and take it as the executable.
You can't see the new program in this directory because you are under ~/src, which is reserved for source code. The Go toolchain has created a $GOPATH/bin directory and you can see the new executable there:
1 2 | $ ls $GOPATH/bin hello-go |
Notice that the executable has taken its name from the source directory (hello-go) and not the source file (hello).
Execute it and enjoy the result:
1 2 | $ $GOPATH/bin/hello-go Hello, Go! |
Add this $GOPATH variable in the .bashrc or bash_profile file. You should also add the bin directory to your $PATH, to have all your Go executable programs available from any directory:
1 2 3 | # bashrc or bash_profile export $GOPATH=~/work/go export PATH=$GOPATH/bin:$PATH |
If you open a new terminal, you should be able to execute hello-go from any directory.
Creating packages
Create a hello-package directory for a new hello package and download its source code:
1 2 3 | $ mkdir -p $GOPATH/src/github.com/raul/hello-package $ cd !$ $ wget https://gist.github.com/raul/345d9443b97ac394f590/raw/hello.go |
This is the hello package source code, with a Yell public function that prints an uppercased HELLO...! with a given string:
1 2 3 4 5 6 7 8 9 10 11 12 13 | // hello-package/hello.go package hello import ( "fmt" "strings" ) func Yell(s string) { fmt.Printf("HELLO, %s!", strings.ToUpper(s)) } |
Now build it with go build and install it with go install to make it available to other programs:
1 2 | $ go build . $ go install . |
Now you have a new $GOPATH/pkg directory, and all your Go packages will be installed under it. You can see the new package at $GOPATH/pkg/darwin_amd64/github.com/raul/hello-package.a.
Notice how, again, Go has named the file after the source directory (hello-package), independently of the name of the package (hello). You'll want to use the same name for both a package and its directory for consistency.
To test that the package is working properly, download a new version of the hello program:
1 2 | $ cd $GOPATH/src/github.com/raul/hello-go $ wget -N https://gist.github.com/raul/9e46c9f1d6e4bcd9df96/raw/hello.go |
The new version uses the Yell function from the github.com/raul/hello package:
1 2 3 4 5 6 7 8 9 | // hello-go/hello.go package main import "github.com/raul/hello-package" func main() { hello.Yell("Go") } |
Compile, install and run the new version:
1 2 3 | $ go install . $ hello-go HELLO, GO! |
The output is uppercased, so the original executable has been replaced the new one, which is using the new package correctly.
Cleaning up
You can now delete all the sample programs and executables:
1 2 3 4 | $ rm $GOPATH/bin/hello-go $ rm $GOPATH/pkg/darwin_amd64/github.com/raul/hello-package.a $ rm -Rf $GOPATH/src/github.com/raul/hello-go $ rm -Rf $GOPATH/src/github.com/raul/hello-package |
Recap
During this tutorial you have:
- installed Go
- created the required directory structure for a local workspace
- learned how to build and install Go programs and packages
- configured your terminal to have access to the
goexecutables and your Go programs from any directory
Let me know if you've found problems while following this tutorial or have any ideas to improve it!